During lockdown many of us experienced something that is the most precious commodity in the universe TIME , and unfortunately it’s something we’re all running out of.
With many of us either furloughed or working reduced hours from home we found we had time on our hands.
With my time I decided to grow some of my very own vegetables on my patio, I needed some large planters to be able to accomplish this . However,at that time garden centers were not allowed to open , I thought I’d gave a go at making planters from old pallets that I have hanging around at the back of the shop.
I am certainly no DIY guru, but thought I’d give it a go while I had time . Firstly as most pallets are 4ft wide they are the perfect size for troughs. Make sure you select the ones that have been heat treated as apposed to fumigated because you don’t want any nasty chemicals to find their way into your veg, then eventually your stomach. They will be a HT mark on the pallet.
Really the most difficult part of this project is taking the pallets apart, it’s just labour that’s all so if you don’t mind a bit of a work out you’ll be fine. I used a hammer and a bolder to knock the wood apart then a crow bar to prise them apart. You’ll need to knock all the nails out , just hit them from the pointed end and then you can just pull them out with the claw hammer.
Once you have all the pieces of wood prepared the fun part starts., you’ll need to saw off two pieces of wood to act as the feet for the Planter. You do this so the bottom of the trough is raised 2 inches off the ground to stop any rock from occurring on the underside of the planter. I recommend that you make them three panels of wood wide by four panels hi this gives you a nice size trough which is deeper enough to enable your plants to establish long strong roots.
As mentioned earlier because most pallets are 4 foot in width you simply just lay the three panels on your workbench of floor and then screw in the two bracing units at either end of those three panels this is the bottom of your trough.
Then all you have to do is to lay the four side panels together and repeat the process again. Try to pick the best side of the wood as your face side as the bracer sections of wood for the sides will be on the inside when you affix the side bracers fix them right on the edge of the longer four panels leaving just the THICKNESS of the panel from the edge approximately 10 mm.
Repeat this process for the other side of your planter . Then you make the ends simply by cutting some pieces of wood the same size as the bottom which as I said earlier is three panels thick.
Then all you have to do is screw each of the end pieces in to the side panels and repeat the process on both ends I recommend using two screws for each as it adds strength and rigidity.
Then you need to line the planters with a liner I just used some old tarpaulin
You can use anything that will creat a water proof membrane inside.
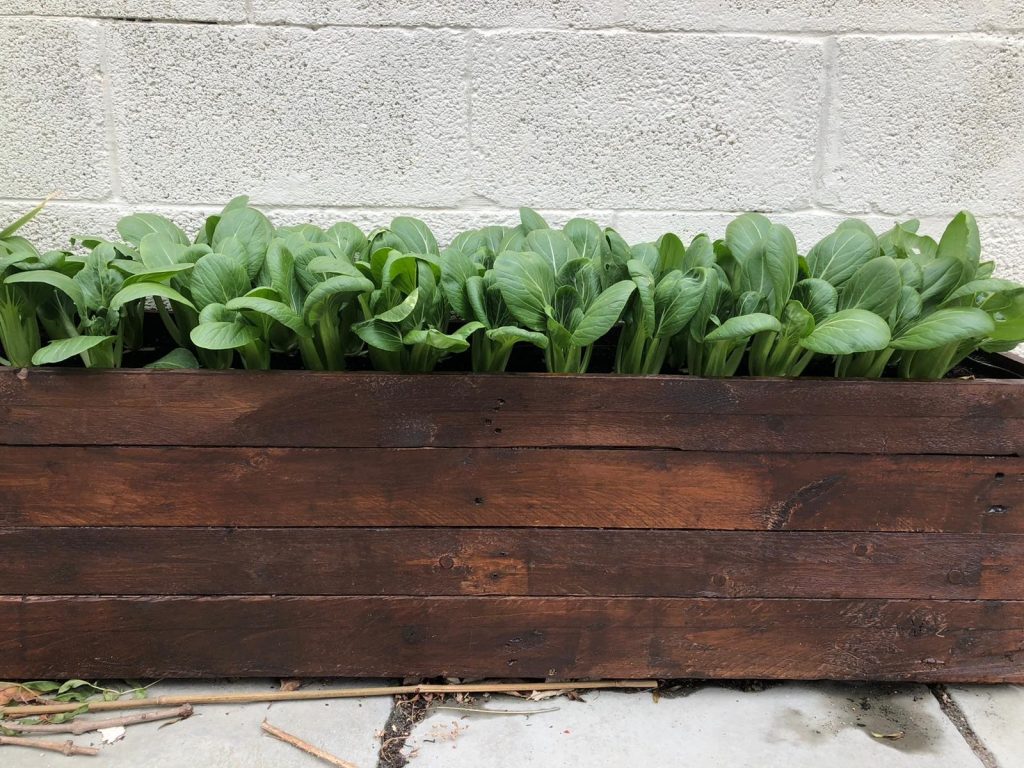
Then I painted the troughs with a teak finish Sadolin fence paint. You could however use any type or colour of weather proof paint if you want to get really creative, I just had this laying around so I used it up.

The great thing about growing your own veg is it tastes much nicer than the old chilled produce from the super market. The other great thing about growing in these troughs as opposed to directly in the ground is it prevents do many slugs an snails from tuning into your grub and it retains all the nutrients better also.
You’ll need to get some old bricks or stones and fill the bottom of your trough up about a quarter for drainage , then full the rest with a good compost and plant your seeds. I chose Bok Choi because I love it gently fried in a wok with olive oil and garlic and also because it only 4 weeks to grow. All you have to do is just keep harvesting the outer leaves off each of the plants.
Thus actually encourages rapid growth and I have been eating it almost everyday since May. In fact I can’t eat it quick enough so have been leaving it on friends door steps during lock down much to their sincere gratification.
Honestly you can knock one of these planters up in a couple of hours and the only tools you need are :
Work gloves , Hammer , drill , 2 “ screws , crowbar ( or anything strong enough to prise the wood apart)
A bolster or chisel and a hand saw
These 4 ft planters would have cost me about a 100 quid each from a shop, they only cost me a box of screws £2.05 from screw fix and of course a little bit of elbow grease.
Thanks for reading, good luck with your pallet troughs and don’t forget to send me your pics.
Love Scape xxx